Vegan Summer Crisp

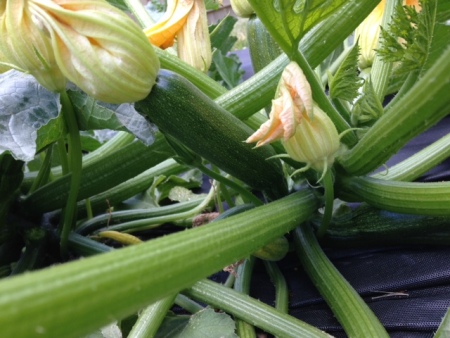
Happy end of along blog hiatus! I’m back in the kitchen, if not in the garden this year (my husband commandeered that little area and I’m trying not to bug him about it.) He took it over because we’ve had a little more on our familial plate than usual: a new baby this summer!

And he’s sensitive to dairy, so I’ve had to cut it out (cue the sad trombones).

But, I’m experimenting more with vegan and dairy free products in the meantime while I wait to be done breastfeeding, so watch for more of those type of recipes on the blog this summer, fall, and winter.

IMG_0770
A mixture of black and red raspberries

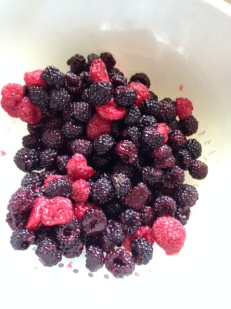
First up, a seasonal cobbler. We discovered this past weekend that vegan butter is a great sub in baking for regular butter, so I had to use our fresh produce to make something amazing. I used a mixture of raspberries and nectarines, but you could use 4ish cups of just about any summer baking fruit (ie, not watermelon).

Ingredients

Filling:

  • 3 cups of fresh raspberries, washed and drained (or equivalent of frozen raspberries)
  • 2-3 large nectarines or peaches, peeled and diced (if skin not easily removed, check the technique here),
  • 1/4 cup of instant tapioca pearls
  • 2/3 cup of white sugar or coconut sugar
  • 1/4 tsp of vanilla (if desired)

Topping:

  • 4 tbsp of vegan butter , melted
  • 1/2 cup of whole wheat flower
  • 1/2 cup of old-fashioned oats
  • 1/2 cup of brown sugar
  • 1/4 tsp of salt


  1. Preheat oven to 350° and spray a ceramic or glass baking dish.
  2. Mix together filling ingredients in dish, ensuring that tapioca well incorporated.
  3. In a separate bowl, mix topping ingredients until form small chunks. Top filling with topping.
  4. Bake in oven for 30 minutes. Should be bubbly and slightly brown when you remove. Allow to cool, and enjoy with dairy-free topping of your choice!

Zucchini Bread

Meet our new overlords. They are green. Very green.

IMG_8766

It’s my first year growing zucchini and I limited myself to two plants. That’ll be the perfect amount, I told myself. Enough that I can have a few stirfries and try out some breads. Well, those two plants have produced veggies about as fast as our resident rabbits have produced bunnies and I am officially zucchini-ed out.

The problem with many zucchini bread recipes is that they don’t use enough of the vegetable! When you’re growing it– and trying to use it up– one zucchini does not make a dent. So this recipe makes two loaves with about twice the zucchini called for many recipes. BUT HOW? you ask.

Remove the extra moisture. Ta-Da! You end up with succulent bread with a nice crumb, but not too much water. Plus, these freeze great! (Wrap them in foil then plastic wrap or a plastic bag for longest lasting freshness.) I know that in the cold October months when I’m sick of pumpkin muffins, I will want a different squash-y bread option and glad I froze a few of these summery loaves.

Zucchini Bread for Zucchini Growers

(adapted from Eating Well)

Makes 2 loaves


Ingredients

  • 1 ½ cups of milk
  • 4 large eggs
  • 2/3 cup of canola oil
  • 2 tsp of vanilla extract
  • 3 large or 4-5 medium zucchini
  • 2 cups of all-purpose flour
  • 2 cups of whole wheat flour
  • 4 tsp of baking powder
  • 2 tsp of ground cinnamon
  • 1 tsp of salt
  • 1 cup of chocolate chips

Directions

  1. Prepare zucchini. First, wash zucchini and slice off ends. Then, shred. I use a box shredder, but I’m sure you could use a food processer if you do so without completely liquefying the zucchini. Take shredded zucchini and put on top of a clean cheesecloth or dish towel. Wring out excess moisture (this will keep your bread moist without making it soggy). Put zucchini aside.
  2. Preheat oven to 350 degrees and spray two loaf pans with cooking spray.
  3. Mix first four ingredients in a large bowl until smooth. Stir in shredded zucchini.
  4. In a separate bowl, mix the flours, baking powder, cinnamon, and salt. Add dry mixture to wet mixture by stirring carefully until few lumps remain. Finally, incorporate chocolate chips.
  5. Pour half of the batter into each loaf pan and bake in preheated oven for 50-60 minutes, or until a toothpick inserted into the center comes out clean.
  6. Allow to cool in pan for about an hour. Freezes well for up to three months, or lasts in the fridge for a week.

Weeknight Cabbage and Chicken Salad

It is too damn hot outside. Seriously. I am not a garden-waterer, especially for veggie gardens and doubly-especially before July. I’m all for building a robust root system. This June has broke me of that, however, and I’ve had to go out every few days to water my plants in this 90+ degree heat.

Needless to say, cold food sounds better right now.

After the birth of my first kid (also during a hot streak), my sister came to stay for a week. She played the perfect aunt and sister, and introduced me to the concept of cold cabbage salads that aren’t cole slaw. It was kind of a revelation.

So, in her honor, a super-easy, short-cuts included Vietnamese-inspired salad, perfect to make ahead and chill. Perfect with a glass of sparkling lemonade (rum optional).

Cabbage Chicken Salad

Serves 4, but easy to double

Time: 15 minutes active, 2 hours inactive

img_8644

Ingredients

  • 1 lb of cooked, shredded chicken (perfect if you’ve got roast chicken leftovers, otherwise, I like to poach in hot water until done– about 20-30 minutes)
  • 1 bag of coleslaw
  • 1/2 c to 1 c of mint or cilantro, chopped*
  • 3 green onions, diced (greens only)
  • 1/2 cup of crushed peanuts (to serve)

Dressing:

  • 4 tbsp lime juice, fresh is preferred
  • 2 tbsp rice vinegar or mirin
  • 2 tbsp fish sauce
  • 1 tbsp sugar
  • 1 tbsp sriracha (optional)
  1. Mix first four ingredients in a large bowl.
  2. Mix dressing in a separate bowl until sugar has dissolved.
  3. Drizzle dressing over salad and mix well. Let salad cool in the fridge (2 hours is a good goal, but might get a bit wilty over 6).
  4. Mix once more before serving, topping each plate with crushed peanuts.

*I often use cilantro because it’s often easier to find fresh, but I know some people find the flavor soapy. Mint is lovely and more traditional, but consider using less than a cup.

Deserving

I don’t deserve the day I had today. The weather: 70 degrees and sunny. Light breeze. The plans: fun small-town events, gardening, playing with kids, and finishing my grading for the semester, grilling, running around until everyone was exhausted, and then tucking the kids into bed with sweet, cuddly stories. I know I don’t deserve it, but I’ll soak it in.

All this goodness can feel bittersweet. These pink flowers were a gift today from our local greenhouse. We’ve been going there for years and wimg_8296e always get our Christmas tree from them in the winter. Lately, I heard rumors that they were closing after this season. I bought the first plants in my first home just before the birth of my first child there. Now, kids in the stroller, the woman at the counter hands my daughter these pink daisies I was eyeing. “Are they perennials?” I had asked the woman earlier in the visit.

“Annuals. Beautiful ones, though,” she said.

When she tucked them in my daughter’s hands, she rubbed her toddler nose deep into the center of the flowers. When she pulled back, it was pollen-covered like yellow powdered sugar. I planted them in a pot in the backyard after we got home.

And so I know that it’s okay that beautiful things don’t always last as long as we hope they will. I won’t get to enjoy these flowers again next year– no guarantees. This greenhouse, in fact, is closing after this summer. Retirement meets realities of modern agriculture– it just wasn’t sustainable any more. This won’t be my greenhouse again, but I’m enjoying it this season.

Not every day is a good day. We’ve had some hard ones lately, but I’ll take the good when it comes, even when I don’t feel deserving.


Favorite Ham Leftover Solutions

My kids and I walked over to a local park yesterday, and my son decided to gather up all of the first-of-the-season dandelions. I forgot the wonder of dandelions as a kid– the joy of every stage of them from a bright yellow flower to the wish-blowing-seed stage. Part of the joy of parenting is getting to experience the wonder again through your kid’s eyes. Confronted with a pile of lopped-off flower heads, we decided to make something of them:

I use this anecdote to introduce the daunting world of ham leftovers. There’s a truism: Eternity is two people and a ham. Not surprisingly, adding two additional smaller mouths doesn’t seem to diminish our ham surplus by much and so I’m trying to get creative with our Easter ham leftover meals. Yes, by the end of a week of ham dinners they can be as ominous as a yellow-head in your lawn, but I swear you can make something good from the situation.

My top three favorite ham meals with quick recipes:

Scalloped Potatoes with Ham

Ingredients:

  • 2 1/2 to 3 lbs potatoes, peeled and sliced thin (I like to use a mandolin– it’s worth the investment!)
  • 1 cup of diced ham
  • 4 tbsp salted butter
  • 3 cups milk
  • 1 cup grated sharp cheddar, with additional cheese for topping if desired.
  • 3 tbsp flour
  • 1/2 tsp of garlic powder
  • 1/4 tsp of pepper (white if you have it!)
  1. Preheat oven to 375 and spray the bottom of a large casserole dish or 9X13 pan with cooking spray.
  2. Melt butter in a sauce pan over medium heat. Lower temperature, and add flour, mixing until mixture turns golden (don’t burn!). Then, add milk slowly, mixing constantly.
  3. Once mixture is smooth, add cheese, garlic powder, and pepper and keep at a low temperature.
  4. Line the bottom of the casserole dish with a third of the sliced potatoes, topping with a third of the ham. Finish the layer with a third of the cheese sauce.
  5. Alternate potatoes, ham, and sauce until all three layers have been put down, and top with additional cheese.
  6. Bake, covered with foil, for 45 minutes, then remove the foil and cook for an additional 15 minutes, or until potatoes break apart easily with a fork and the casserole is bubbly.

Slow Cooker Split Pea Soup

Ingredients:

  • 1 lb of dried green split peas
  • 1 ham bone with meat, additional ham as desired
  • 3 carrots, peeled and diced
  • 2 stalks of celery, diced
  • 1/2 tsp of dried thyme leaves
  • 1/4 tsp of pepper
  • 4 cups of veggie broth
  • fresh lemon (if desired)
  1. Combine ingredients in a crock pot and cook for 8 (if pre-soaked the split peas) -10  (if didn’t presoak) hours on low.
  2. Before serving, remove the hambone to a cutting board and cut remaining useful meat, stirring it back into the soup. If desired, squeeze fresh lemon over soup and stir in (adds a nice, citrusy freshness).

Savory Waffles, adapted from America’s Test Kitchen

Ingredients:

  • 2 cups flour (I use a 50/50 split of whole wheat and all-purpose)
  • 1 tbsp white sugar
  • 1 tsp baking powder
  • 1 tsp salt
  • 1/4 tsp dry mustard powder
  • 1 3/4 cups of buttermilk (or make your own)
  • 4 tbsp melted, cooled unsalted butter
  • 1 large egg
  • 1/2 cup finely diced ham
  • 3/4 cup of shredded cheese (cheddar, fontina– any mild cheese is a good choice for this)
  1. Preheat waffle iron and preheat oven to 200 degrees.
  2. Mix dry ingredients together in a large bowl. In a separate bowl, whisk together the buttermilk, butter, and egg.
  3. Combine wet and dry ingredients gently– just like most recipes involving baking powder, you don’t want to overmix. You might see a few lumps remaining, but that’s normal. Fold in the ham and cheese until incorporated.
  4. Spray the waffle iron with cooking spray, the add the correct amount of batter for your particular waffle iron. Cook until golden brown, and place on a baking sheet in oven until all waffles are prepared.

I can vouch for each one of these recipes, and the savory waffles are an special favorite in our household!

Happy ham season– sometimes eternity can be just the right amount of time to enjoy something good.

Plant Potatoes on Good Friday

There’s an old wives tale that the gardening season officially begins on Good Friday, that this day, set from the church calendar, is the day to plant potatoes. Tomorrow is absolutely booked up– and scheduled to be rainy– so I started a day early.

Potatoes are odd plants, and last year was the first time I tried them in my garden. I admit that the experiment was spurred by my reading of The Martian last year. I dare you to read 200 plus pages about tubers in space and not come away with a respect for the plant. I have a few favorite potato recipes that you must check out, if you doubt my love (here and here).

Yesterday I cut old potatoes with one or two eyes per segment and let them sit. This morning, I dug trenches and put them a distance apart. You need the space because, like prairie dogs, potatoes burrow underground. One of the joys of potatoes is discovering them, finger deep, as you root around the base of the plant. My father told me you can “steal” potatoes as the season goes on– taking baby potatoes early in the season for the tenderest and sweetest and letting some mature to tide you through the fall. If you’ve never planted potatoes before, I highly recommend it.

The peat pellets and my pretty potential peppers- A spring tongue twister

I return to gardening every year for more than the harvest. Gardening is an education in itself. I can feel the accumulation of my successes and failures like tree rings, and it seems foolish not to keep experimenting year after year. Potatoes were my experiment last year, and this year it is seed starting. I bought one of the domed kits from the hardware store and started a few of my veggies from seed. I’m trying peppers, bush cucumbers, and basil this way, so we will see if anything comes from it. Any tips from you who have done this?

This year will be the first season that my son, aged four, can really participate in the gardening process. He helped me pick out the seeds from the seed store (TURNIPS, he exclaimed with glee, as if he actually ate them). My daughter, aged two, is at the reckless but fascinated stage. Both of them enjoyed our annual trip to the farm supply store to gaze at the chicks. God help me if that isn’t my experiment next year….


My daughter and the chicks


What have you planted so far?

Honey

I have quite a few kitchen gadgets, but there’s something that I’ve always wanted and never had need to buy… until now:

img_7881.jpg

I’ve always been a squeeze-bear honey chick until last weekend. We went to a fundraiser and bid on a quart (!) of honey from a local farm. As it happens, the apiarist sat at our table and we got to hear the story of how this honey came to be. This honey came from a swarm that he caught one afternoon, completely by chance. We’ve got a local honey connection now, and you bet I’m not going back to the bears. Needless to say, it’s pretty awkward to get honey out of a quart mason jar, so we invested in this beauty, perfectly labelled little container.

It makes me feel incredibly adult.

Living in Iowa means little joys like this, running into someone who taps Maple trees or keeps bees or chickens. Butchered hogs? I know a guy. Fresh sweet corn? Take all you can carry. Don’t even start on pumpkins. Acres of them. On days when I miss city life (concerts-book readings-movie theaters with more than one screen-trivia nights-Thai food), it’s nice to look at my honey pot. It’s pretty full as it is.

This little jar is extra sweet right now, because my son (almost four) just started getting into Winnie the Pooh. He tucks his body into mine, oversized book in hand, and wants to read all about the honey tree and Pooh getting stuck in Rabbit’s house. The days go so fast that sometimes it’s nice to have something to hold onto– a child’s hand, a spoonful of honey, a warm mug of tea or honey toast.

No recipe this time, just sending you sticky-fingered good wishes from rural America.


via Daily Prompt: Label

A Winter Update

I don’t usually post during the non-growing season, but I thought I would update with a question and a quick recipe—

Question first: How in the world do you take care of succulents?

I’m become a succulent mom very suddenly (it was a Christmas gift) and I think I’m doing it all wrong. Advice on soil mixture? Care and watering suggestions?

So now that you’ve earned your keep, a quick recipe to tide you over (and the perfect potluck recipe for football fun):

Julia’s Orzo Salad

I should note that my name is not Julia. Julia is the person who perfected the amazing additions to this salad, and who is bugged– constantly– to bring this to gatherings. Much love and adoration to Julia, for this and many other reasons!

Ingredients:

  • 1 (16 oz) box of orzo pasta
  • 1/2 small head of broccoli, cut into small florets
  • 1 cup of red pepper, diced
  • 4 oz crumbled feta
  • 4 oz of pepperoni, diced
  • 1- 2.4 oz can of sliced black olives, drained and rinsed
  • 1 packet of ranch dressing mix
  • 4 T of red wine vinegar
  • 3 T of olive oil
  • 2 T of white sugar (1 T if using splenda)
  • 1 tsp of dried basil leaves
janthrumarch16-140
Pardon the blurry picture. I was too eager to eat this to take a better one!

Instructions:

  1. Make orzo according to box instructions.* During last minute of cooking time, add broccoli florets to boiling water. Drain broccoli and orzo in a colander and rinse with cold water.
  2. In a small bowl or lidded jar, mix last five ingredients.
  3. Put orzo and broccoli in a large mixing bowl and combine with remaining ingredients, mixing well with vinaigrette.
  4. Let salad rest in refrigerator for at least one hour. Can be made a day ahead. If it seems dry, rewet with 1 tsp of each red wine vinegar and olive oil.

*Orzo expands like crazy, so make sure you cook it in a large pot with plenty of water.

Red and Blue Crumble Pie

I admit it, okay? No need to give me the third degree. I stole it, and I would do it again. I stole the strawberry from the strawberry plant at the greenhouse, the tiny, red one that was almost too ripe. I did it because I couldn’t stand to see it go to waste.

It’s that lovely season where the weather isn’t roasting just yet, berries are cheap, and I’m in a baking mood. All of these factors collide into a mixed berry pie of blueberries and strawberries, just in time for your summer savoring.

Red and Blue Crumble Pie

Ingredients:

Filling:

  • 2 1/2 cups of sliced fresh strawberries
  • 2 1/2 cups of fresh or frozen blueberries
  • 2 tbsp of tapioca
  • 1 tsp of vanilla extract
  • 2/3 cup of white sugar
  • 1 premade pie-crust (or make your own)

Topping:

  • 2/3 cup of all-purpose flour (or a mixture of 1/3 cup oats, 1/3 cup flour)
  • 1/3 cup of butter, slightly chilled and cut into small pieces
  • 1/2 tsp of cinnamon
  • 1/2 cup of brown sugar

 Directions:


  1. Preheat oven to 375°. In a large bowl, combine the first five ingredients and let macerate for 15 minutes.
  2. In a smaller bowl, combine the flour, cinnamon, and brown sugar and stir well. Cut in the butter until it forms small chunks.
  3. After fifteen minutes, pour the filling into the prepared pie crust and cover with topping. Put pie pan on a rimmed baking sheet (for easier clean up, cover with foil).
  4. Bake in the oven for approximately 50 minutes. Let cool and enjoy!